Projects
This documentation describes Heartex platform version 1.0.0, which is no longer supported. For information about setting up projects in Label Studio Enterprise Edition, the equivalent of Heartex platform version 2.0.x, see Set up a labeling project.
Every labeling and data exploration journey starts with creating a new project. The project consists of a dataset, the UI to label and explore it, a machine learning model to assist you with labeling, and possibly several external collaborators or your team’s members.
Create a new project
Starting a new labeling project in Heartex is as easy as pressing the “Create from scratch” or “Use template” button projects dashboard page. Administrators and Data Science users can start new projects.
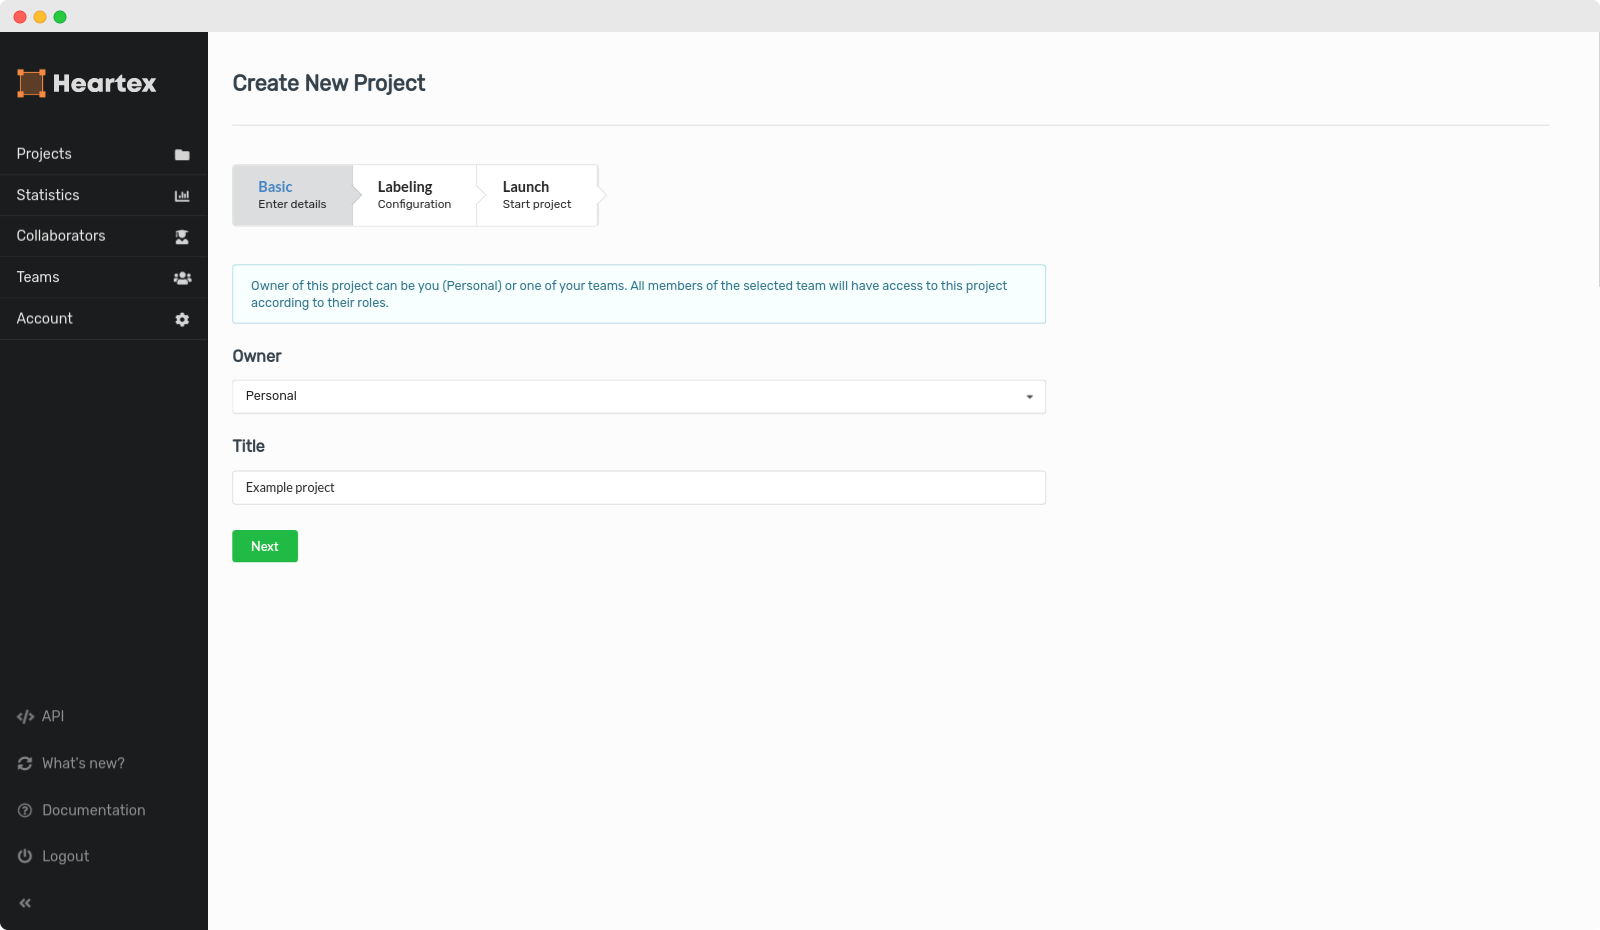
Project name
The first step in creating your project is to provide a project name. The name will be the internal reference for the project which users will see on their pages. Below, we fill out the name and description for the classifier project:
Editor config
Each project has it’s own UI for the labeling. The configuration is based on HTML-like tags, which internally are mapped into the associated React classes. You can check out editor page or tags reference to get a better understanding of what’s supported. For popular scenarios, there are pre-configured templates available here
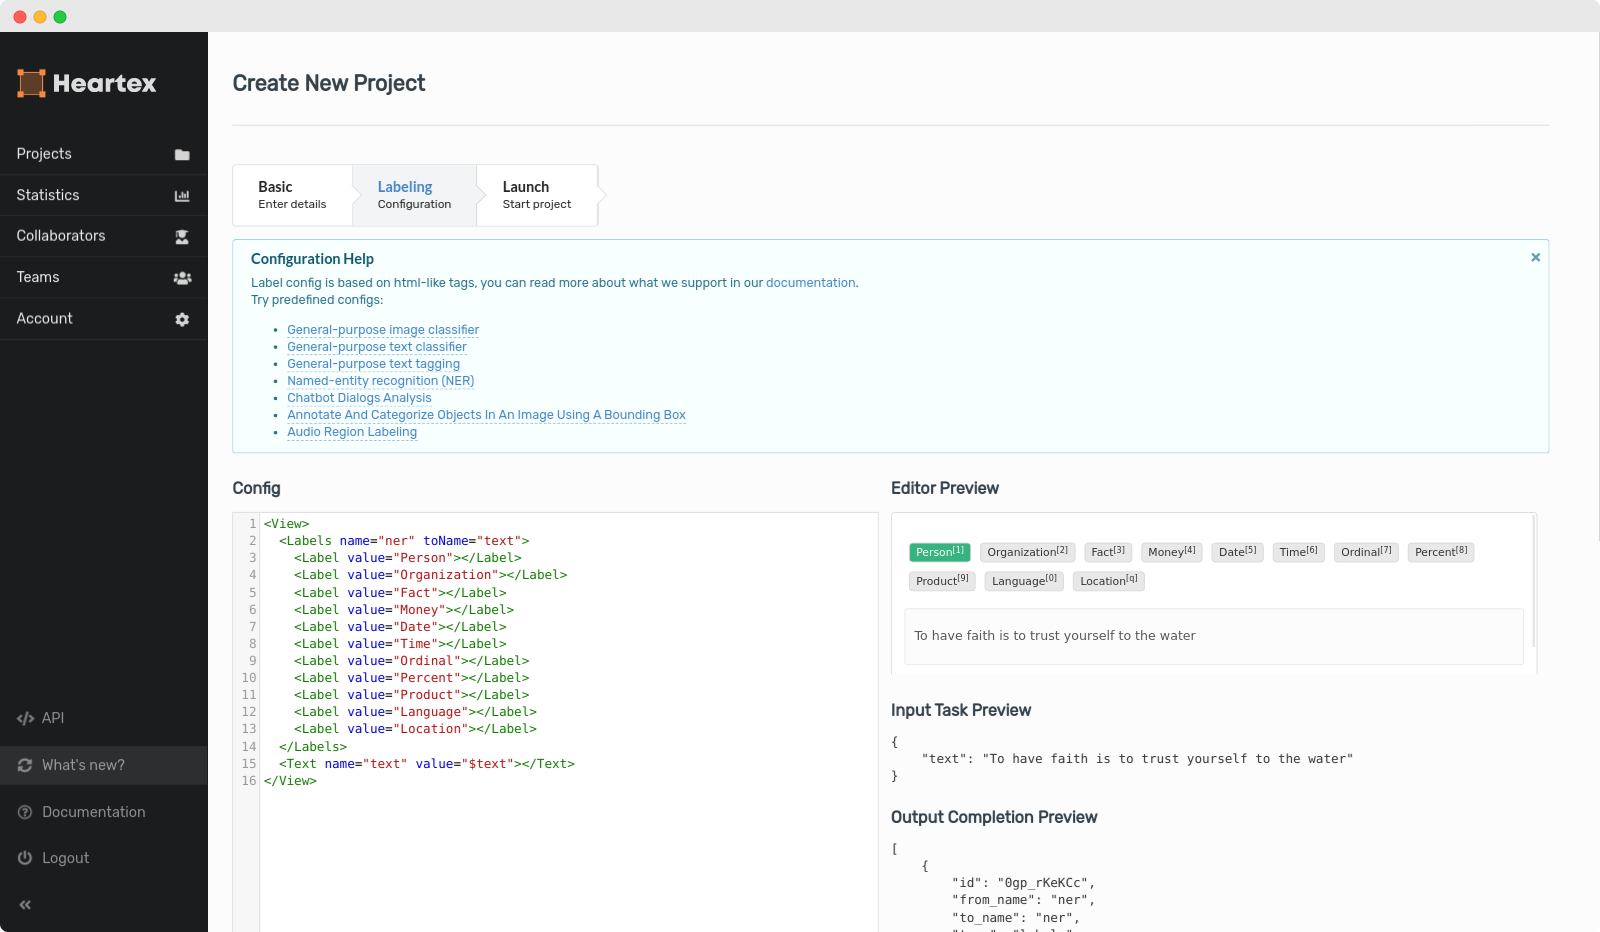
You can modify the config after the project is created, but only if there are no completions created.
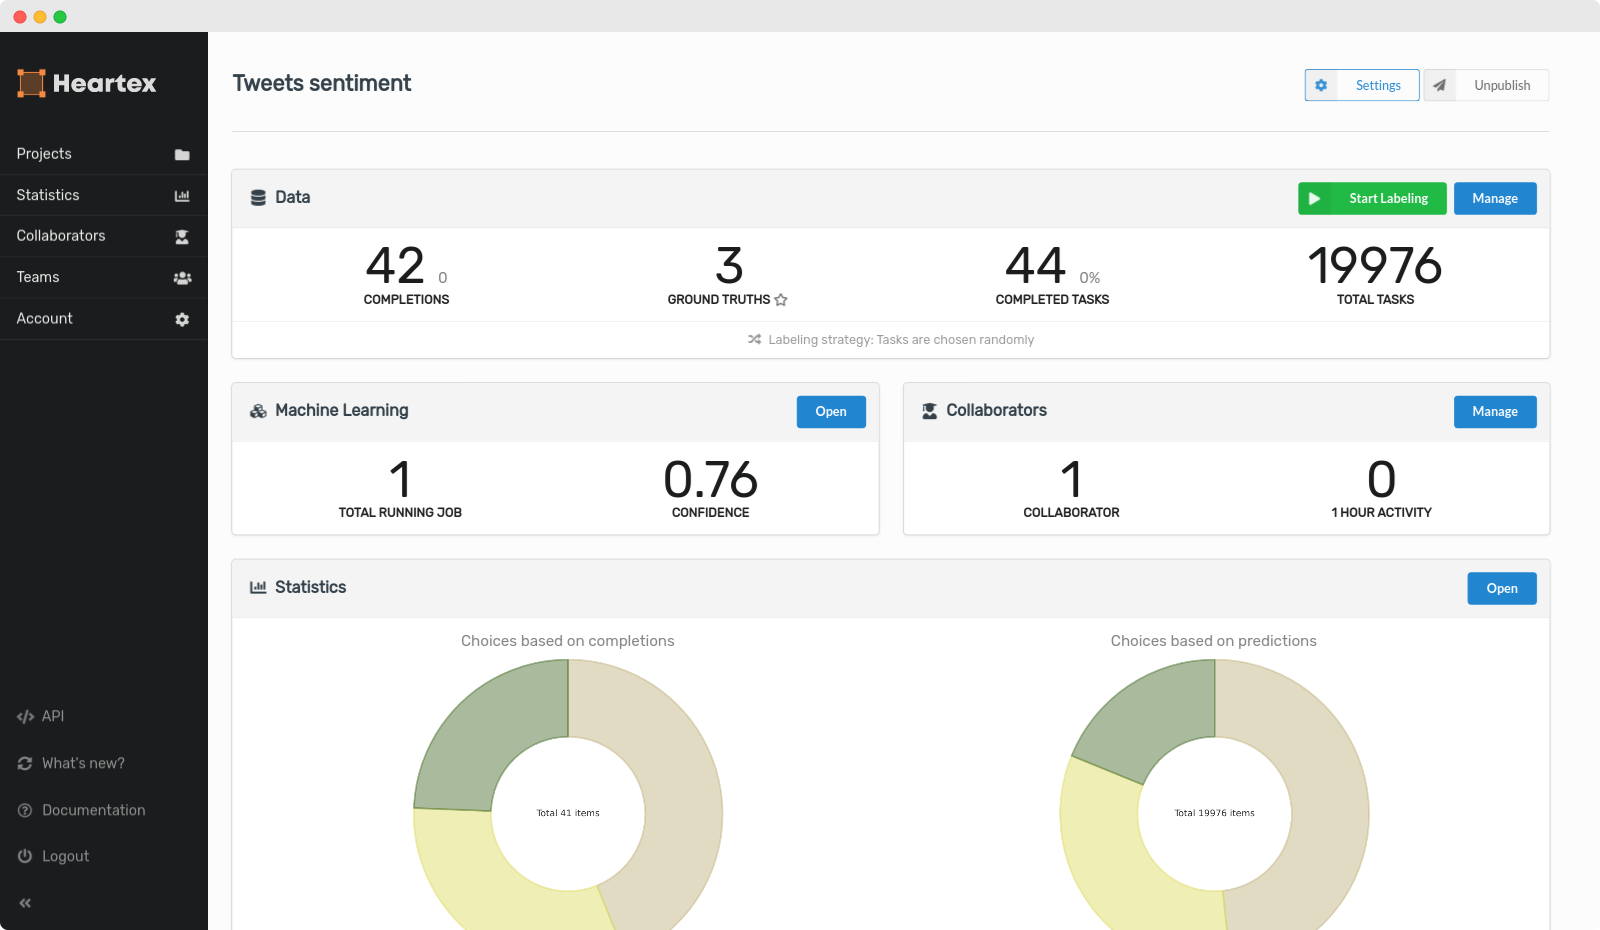
Project Dashboard
The project dashboard serves as the central page for a Heartex user. Each project has its dashboard page, which is created when you start a new project. The page provides an overview of significant project statistics. Depending on permission, different user roles get different parts of the dashboard shown to them. For example, Lead Annotators will only see the Data Manager.
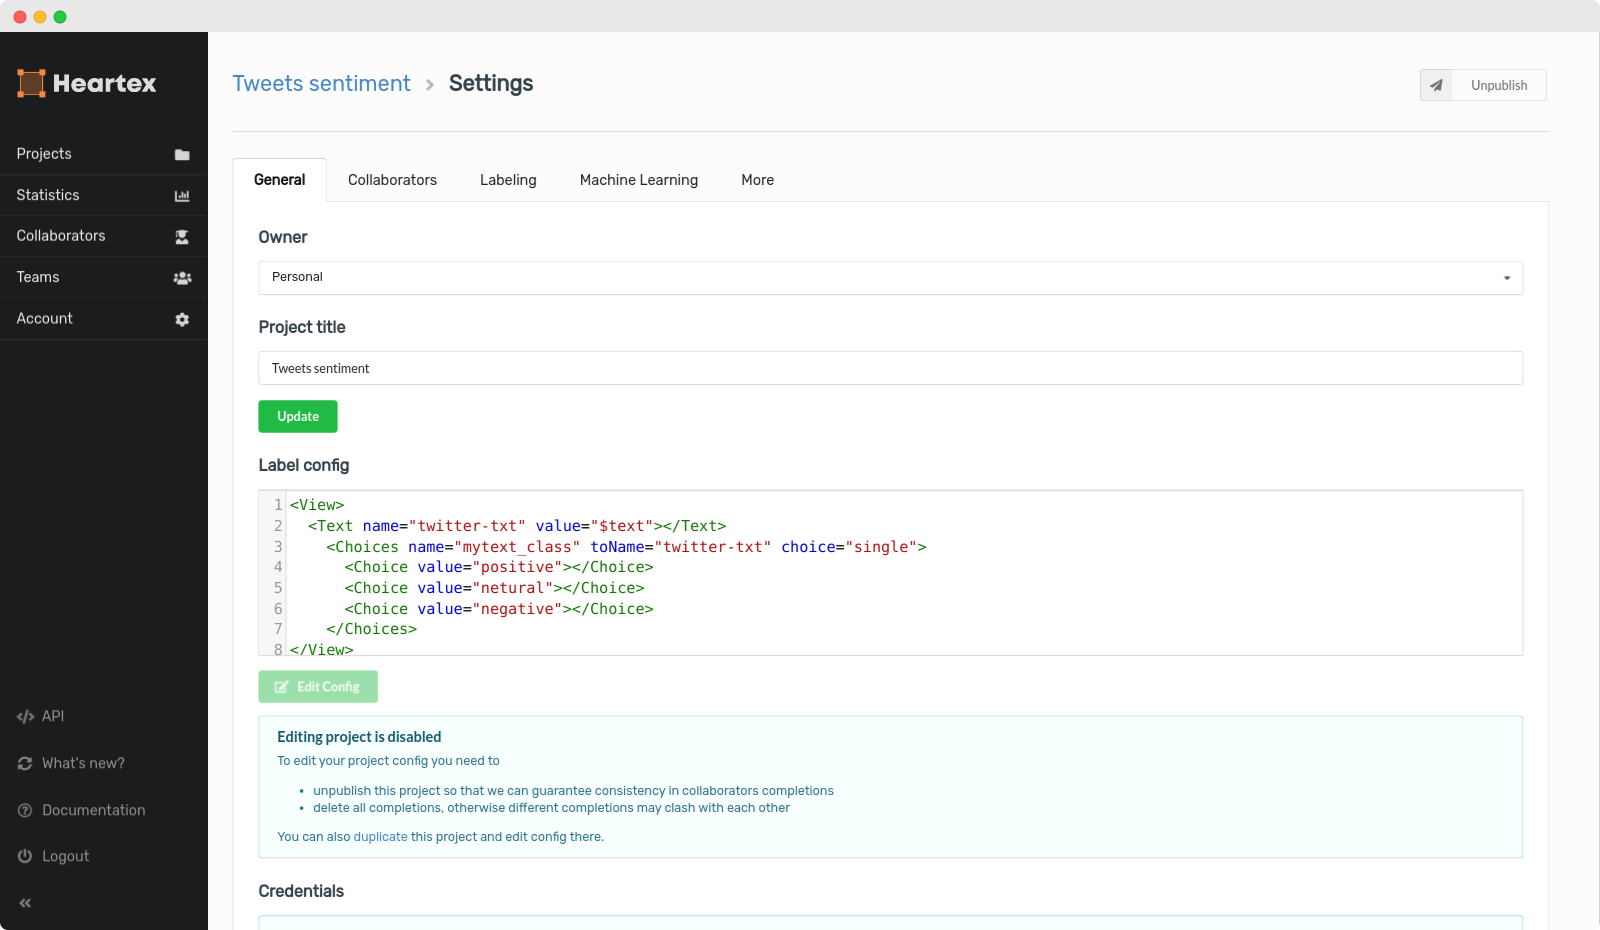
Project Settings
Each project can be extensively configured and tailored for your particular labeling scenario.
General
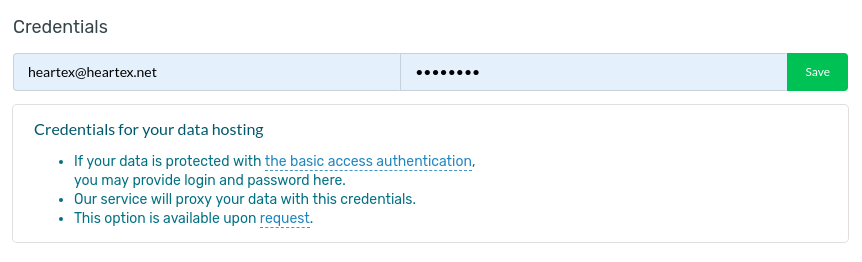
Data credentials
If you use a resource hosting with the basic auth then you can use Heartex Proxy server which provides basic auth (http login & password). To use this option just add login and password in the project settings and press “Save”.
Your domain from task data must be in format
{http://|https://}<name>.<zone>[:port], examples:http://domain.com,https://domain.com:7777. Wrong example:http://domain:7777.

Collaborators
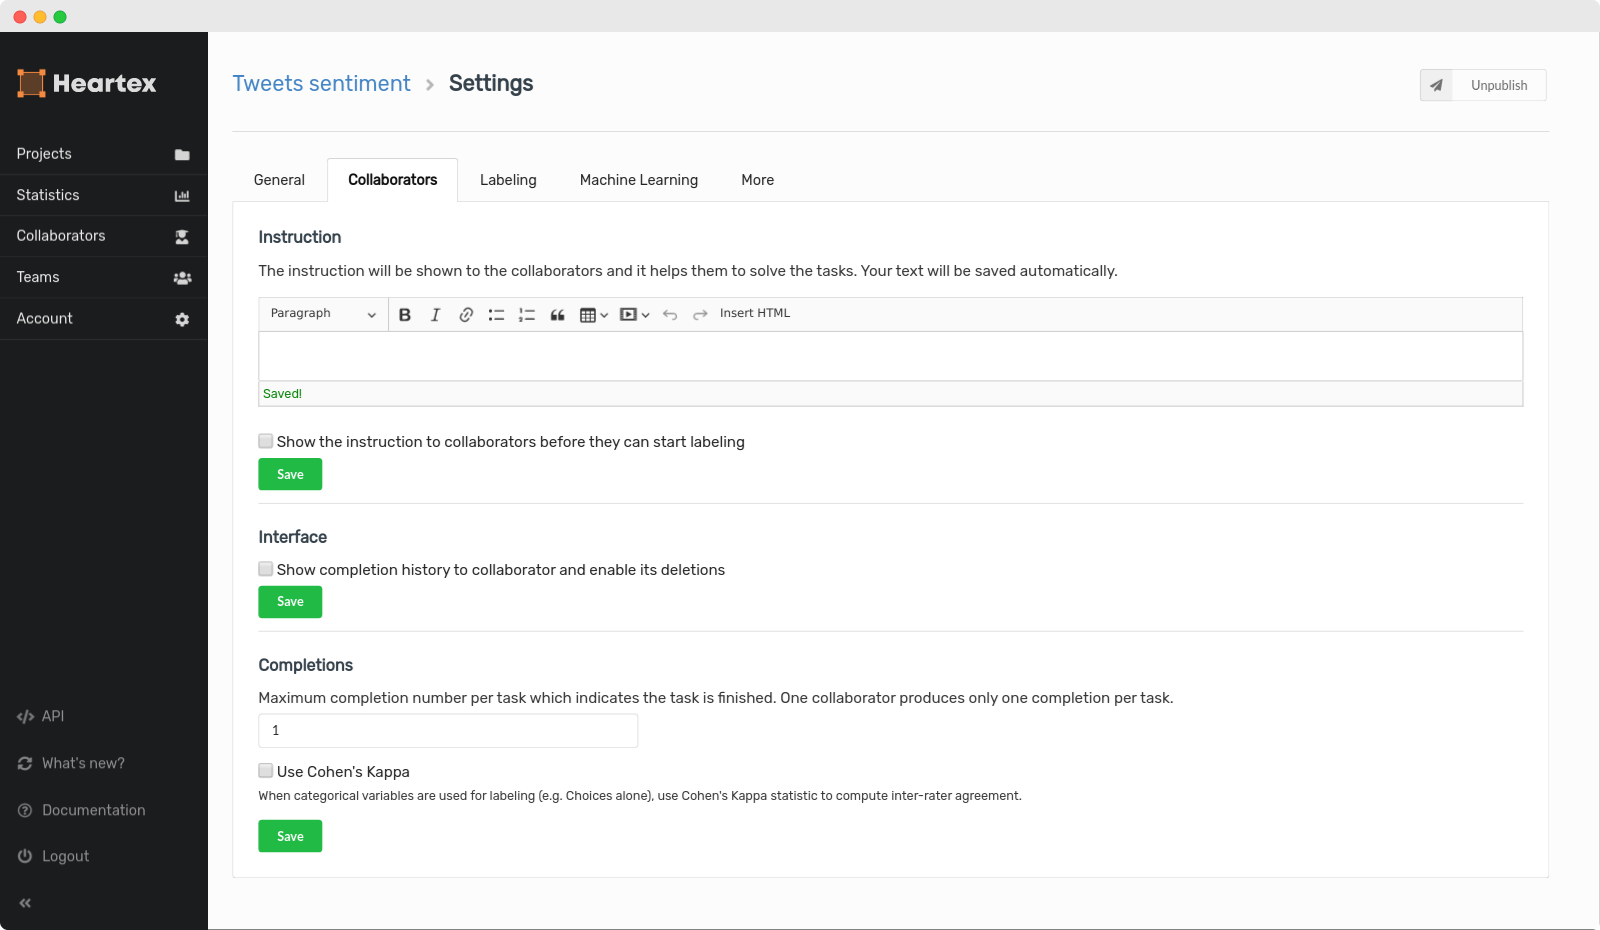
Configure instruction. It should describe what an annotator should do in each task. There is support for reach text and auto-saving
Labeling
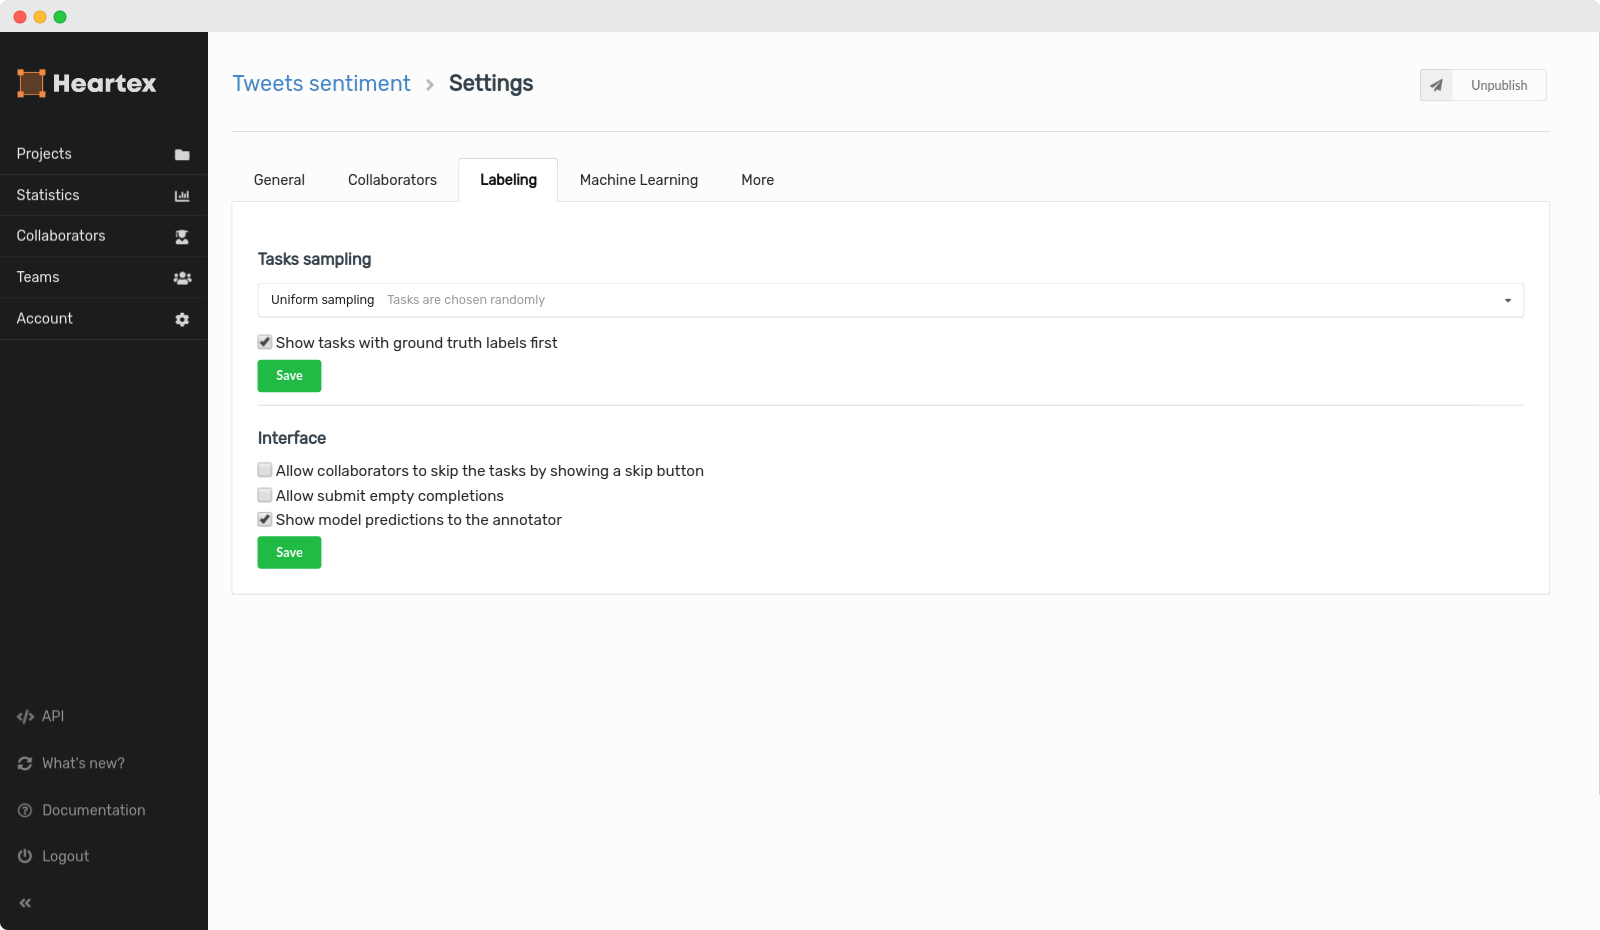
Number of completions of the task before it’s considered as Done
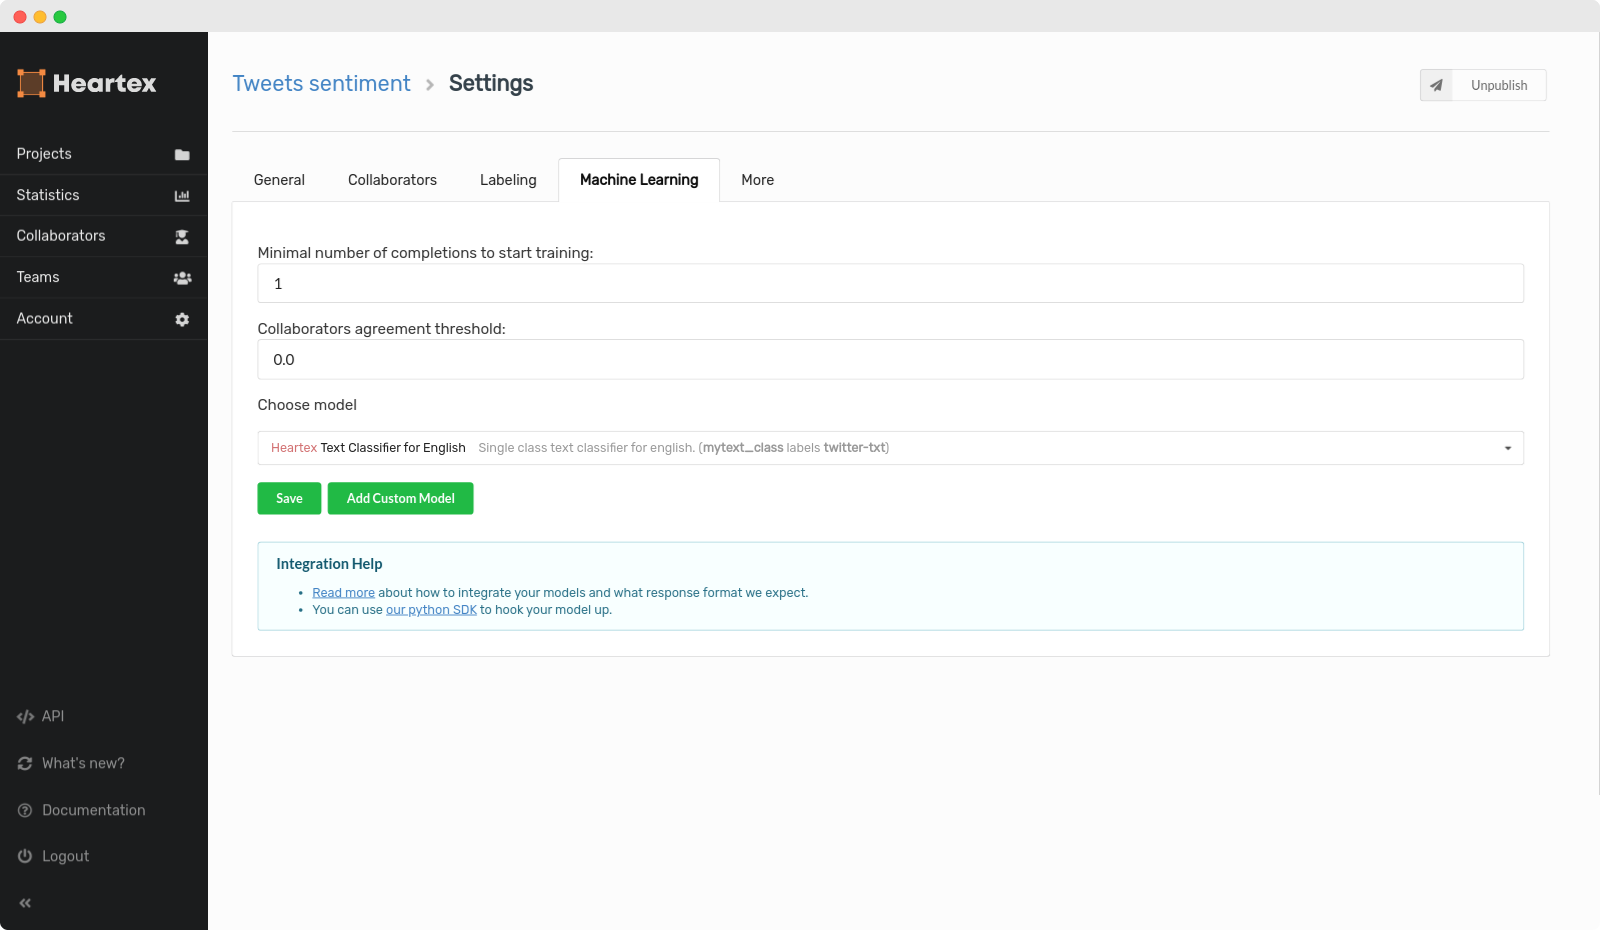
Machine Learning
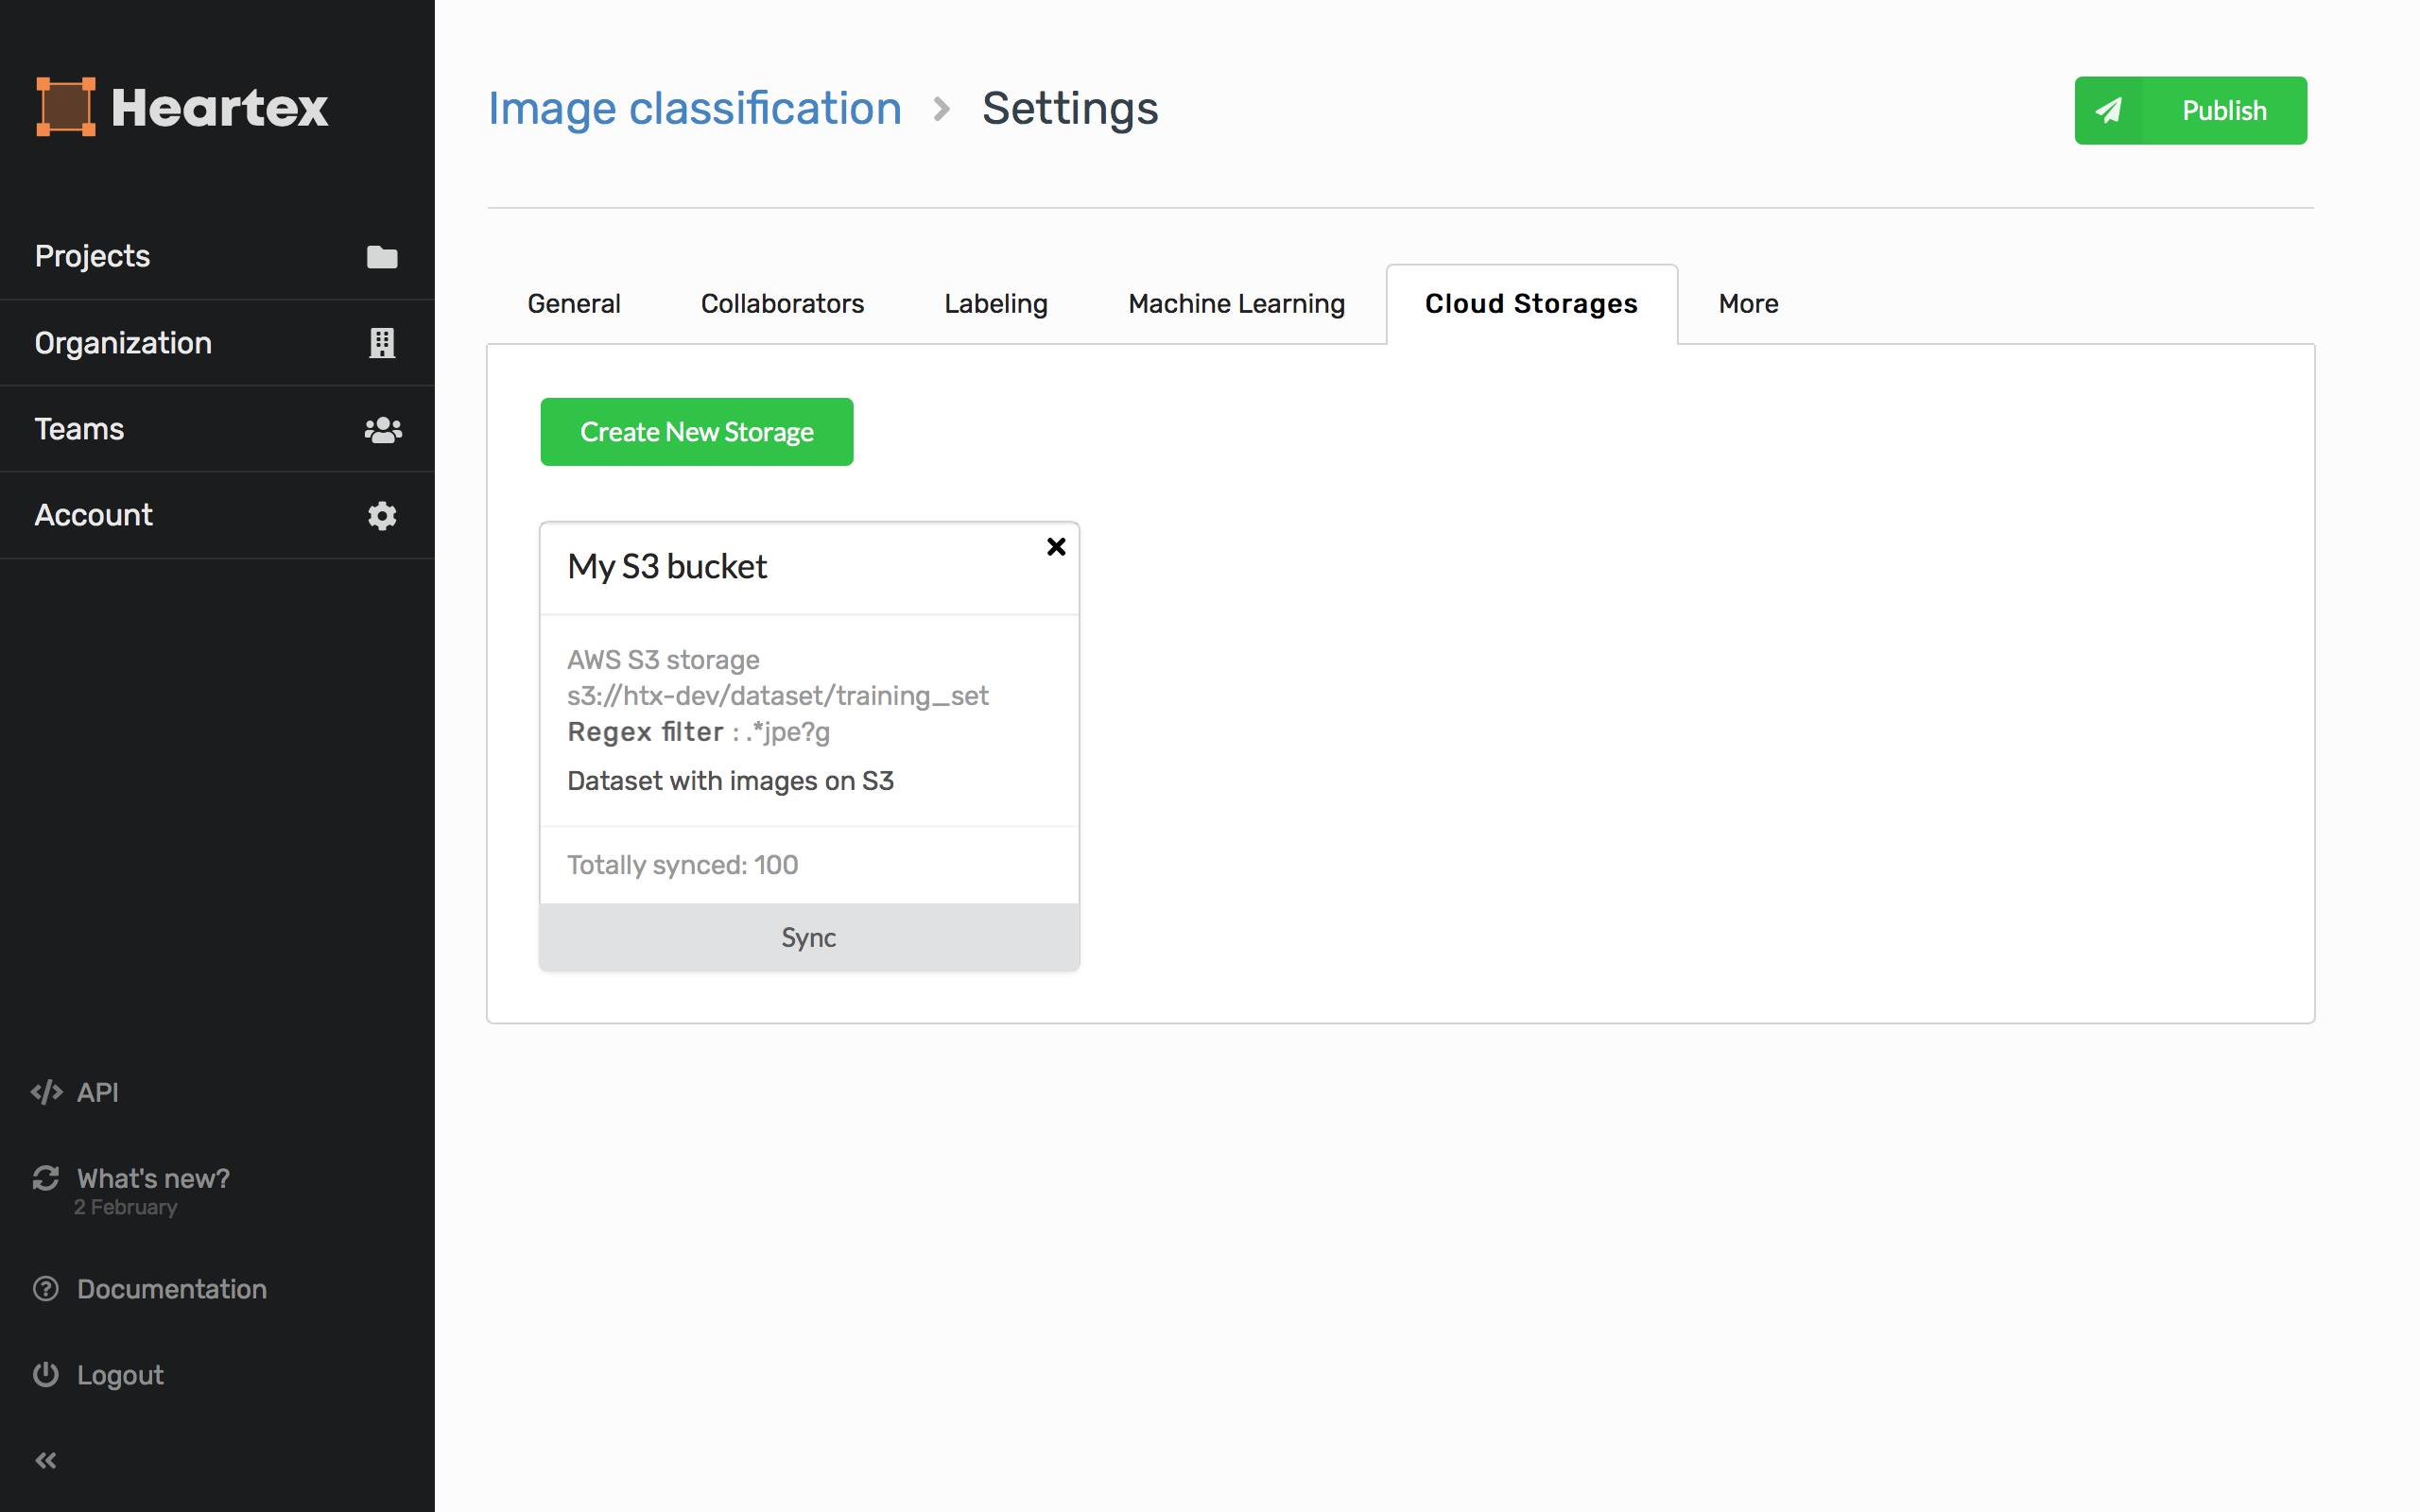
Cloud Storages
You can connect AWS S3 cloud storage to your project, then sync your project with the data stored in your bucket, e.g. creating new tasks on-the-fly from the remote images.
The cloud storage connection is dedicated to the following scenarios:
- You have a bucket where new files appear from time to time, and you want to avoid manual task creation and import.
- You let the Heartex platform takes care of managing pre-signed URL creation & expiration
Cloud storage connection is not intended to:
- Resolving predefined
s3://-like URLs in your tasks - you have to either manually create pre-signed URLs to your S3 bucket, or connect and sync the S3 bucket to the Heartex platform.
Creating new storage connection
It’s possible to create many storage connections by pressing the Create Storage button, sync them with project tasks by clicking Sync and remove the created connection using x cross icon in the right upper corner.
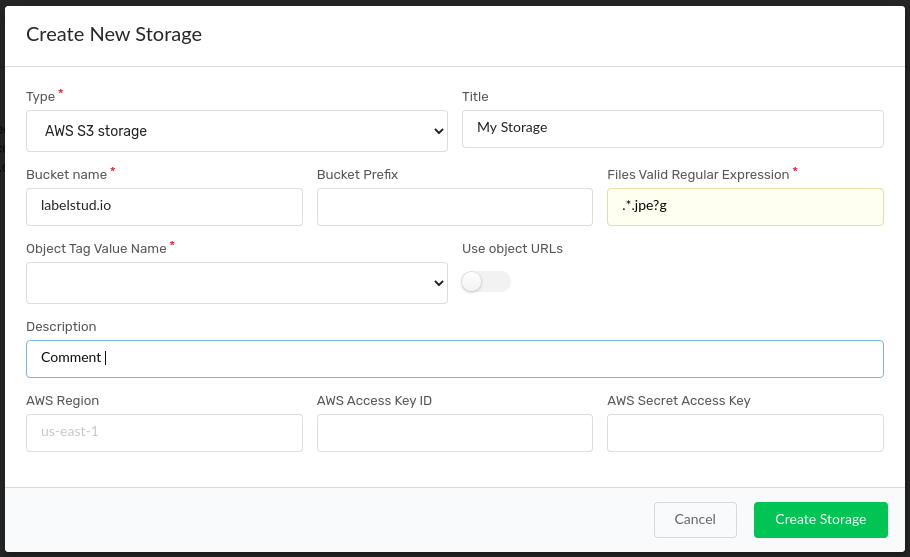
When creating a new connection, you have to specify:
- You storage title
- S3 bucket name
- Regular expression to filter out unnecessary file objects (Note: if you want to select everything, type
.*) - Prefix paths used for locating folders inside buckets. (Note: if specified, a bucket is NOT scanned recursively under specified prefix path - use different storage connections for that reason, or leave prefix blank)
- You storage description
- Use object URLs selector: if checked, only s3 URLs are imported (this is an actual use case when you have binary large objects stored on S3 e.g. image or audio files.). Otherwise, all objects are fully downloaded and interpreted as JSON-formatted tasks.
- Object tag value name selected from all available
$valuesattribute in object tags. Only applicable when the “Use Object URLs” selector is checked. - AWS credentials (optional)
- AWS S3 bucket region (optional)
Example: connect S3 bucket which updates on a daily basis
Here is an example of how a cloud storage connection could be used.
Step 1. Assume you have an AWS S3 bucket where the audio files are constantly uploaded in a .wav format, and stored under s3://audio-bucket/YYYY/MM directories on a daily basis.
Step 2. Your goal to create an annotation project to transcribe audio, without a need to manually import new annotation tasks every day.
Step 3. After creating a blank project, you’re going to Settings -> Cloud Storage then fill all required fields, specifically
- Set Bucket Name: audio-bucket
- Set Bucket Prefix: YYYY/MM
- Set Regural Expression to filter specific files: .*wav
- Turn on Use object URLs toggle - it means that your JSON-formatted tasks will be created on the fly, instead of imported directly from S3 storage. In the former case, set Object Tag Value Name to specify which object tag should be used to create new tasks (in common case if you have only one object tag - just ignore this)
- Don’t forget to use proper AWS credentials and an S3 region name!
- Press the Create button to create new storage
Step 4. To import all tasks recursively from the specified bucket directory, just press the Sync button on a storage panel. If everything is set correctly, a pop-up notifies you about waiting for a while.
Step 5. On the bottom of a storage panel, you’ll see Totally synced: 123 number of totally synced tasks - it means that now you have 123 new tasks created in a project. Go to the Project data manager page and check it.
Note: When you create new storage that references the file already synced by another storage connection, a new task won’t be created, and you’ll probably see
Totally synced: 0.
Flexibility over AWS parameters
When you’re using a single role to access all your buckets in a single AWS region, it is tiresome to copypaste AWS credentials and an S3 bucket region name every time you create a new storage connection.
To simplify this, AWS credentials & region names are now reused on a project or an organization levels.
Furthermore, now you can freely import tasks with URLs having s3:// prefixes, they will be resolved with Presigned URLs. To achieve this, AWS parameters (credentials and regions) are looked up in the following order:
If S3 cloud storage is connected to the project and the task was imported from that storage - parameters from that storage are taken;
If any cloud storage is connected to the project - parameters are taken from the latest created storage
Otherwise it seeks the globally specified environmental variables with
HEARTEX_prefixHEARTEX_AWS_ACCESS_KEY_ID=<The access key for your AWS account> HEARTEX_AWS_SECRET_ACCESS_KEY=<The secret key for your AWS account> HEARTEX_S3_REGION=<Your S3 bucket region name, "us-east-1" is used by default>
Note: Setting environmental variables available only for on-premise users
Or finally without
HEARTEX_prefix:AWS_ACCESS_KEY_ID=<The access key for your AWS account> AWS_SECRET_ACCESS_KEY=<The secret key for your AWS account> S3_REGION=<Your S3 bucket region name, "us-east-1" is used by default>
Troubleshooting
Some common issues are:
- I’m pressing the Sync button on the storage panel, but
Totally synced: 0remains unchanged and/or I don’t see the new tasks imported in a data manager.
=> Check that you’ve specified the correct AWS credentials. Make sure they work from console aws client. If you’re using on-prem deployment options, check for the right environment variables exposed.
=> Check that there are files under the specified bucket prefix. Note that when prefix was set, subfolders are not scanned recursively.
=> If you’re using multiple storage connections, ensure that another connection doesn’t already hold the references for the objects you’re trying to import. If you want to release them from the previous sync, delete that old storage then press the Sync button on the newly created.
- I see newly imported tasks in my project data manager, but when I try to label/explore them, nothing is loaded
=> Probably CORS are misconfigured. Check this guide how to configure CORS.
=> You’ve specified the wrong AWS bucket region (us-east-1 is used by default). Recreate S3 storage connection with a valid AWS S3 bucket region name, or specify S3_REGION environmental variable in case of on-prem deployment.
=> In any other errors, check the browser console (Ctrl + Shift + i in Chromium), and contact support team.
Duplicate & Delete
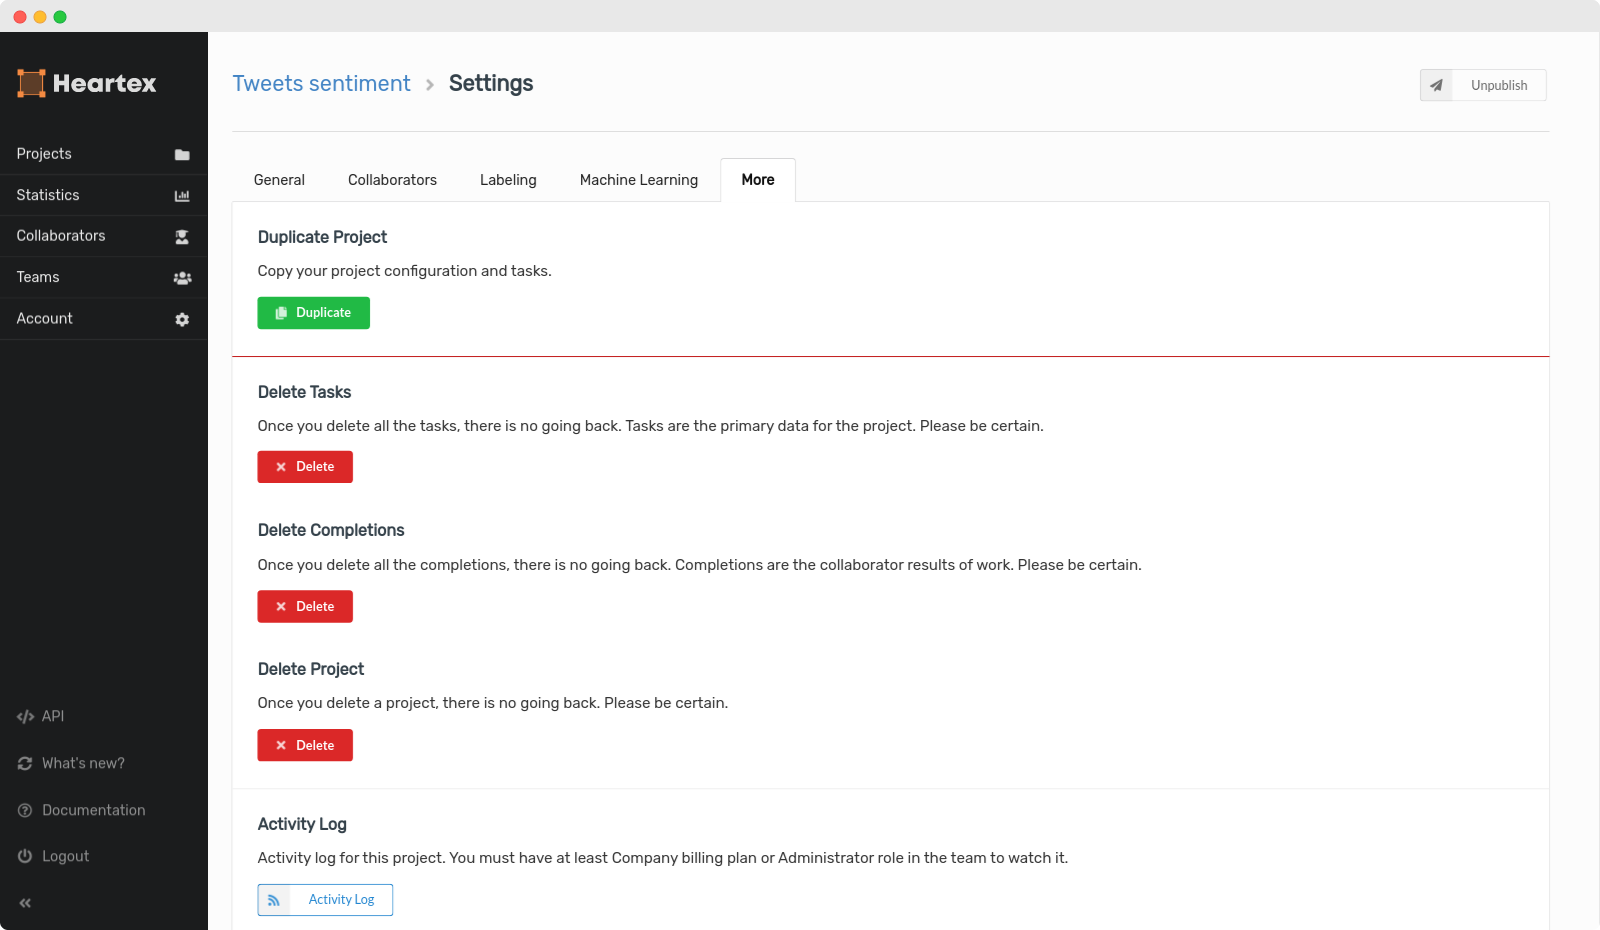
Inside the “More” panel, you can delete the entire project, only completions or only the tasks. You can also duplicate a project.
Using Templates
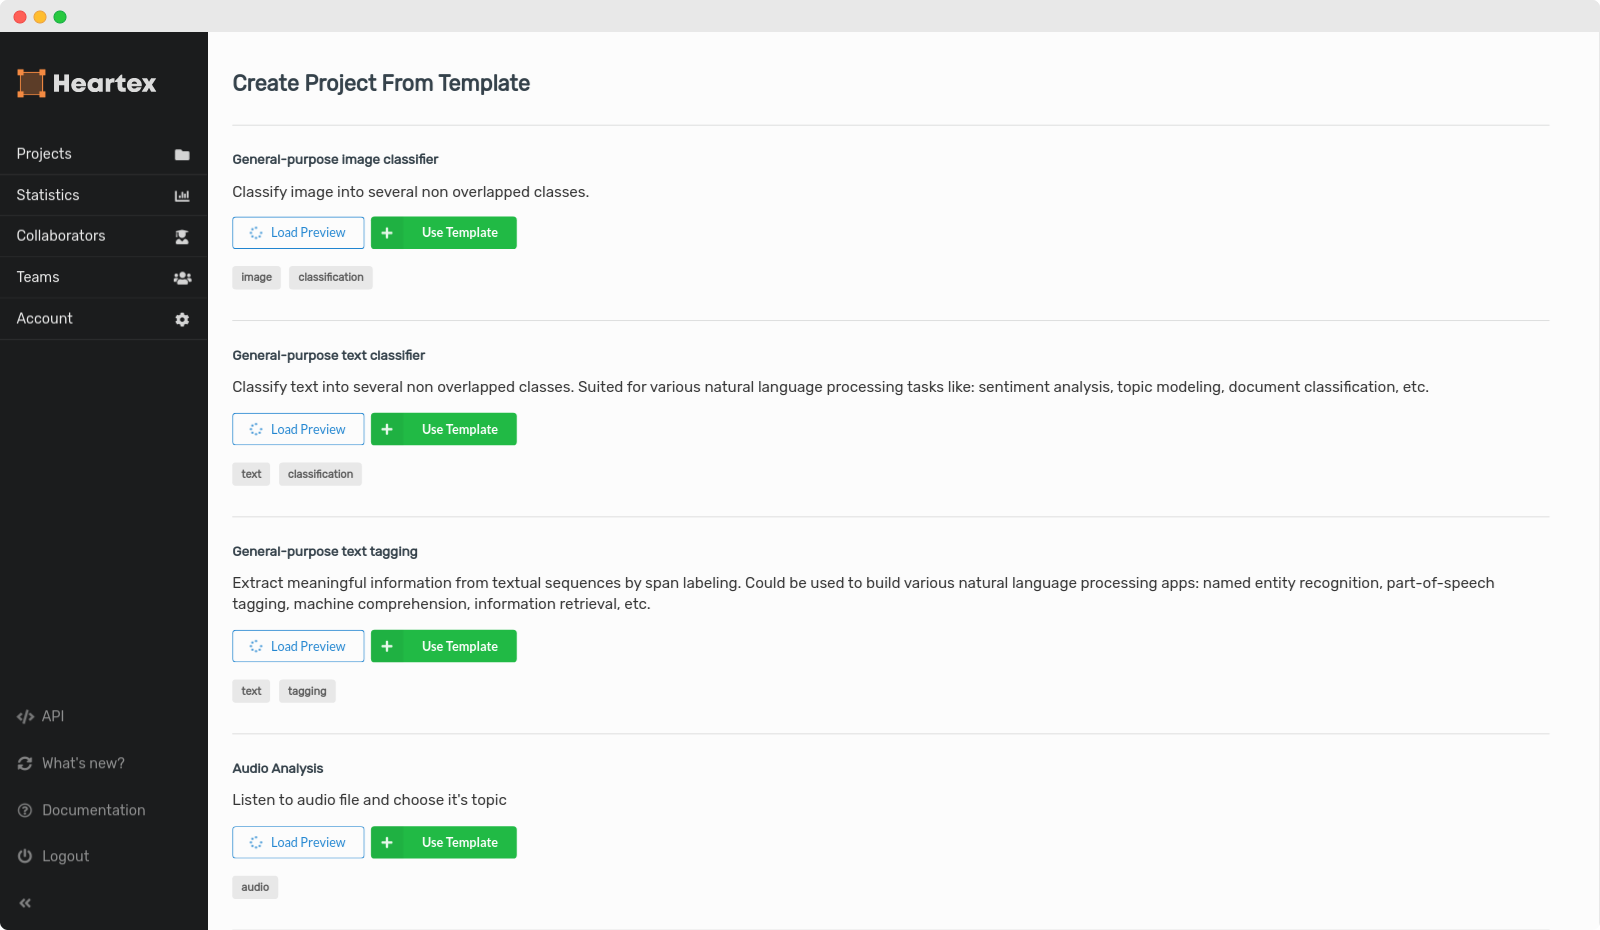
For your convenience, you can create a new project from predefined templates.