Embed Annotation
This documentation describes Heartex platform version 1.0.0, which is no longer supported. For information about Label Studio Enterprise Edition, the equivalent of Heartex platform version 2.0.x, see Label Studio features.
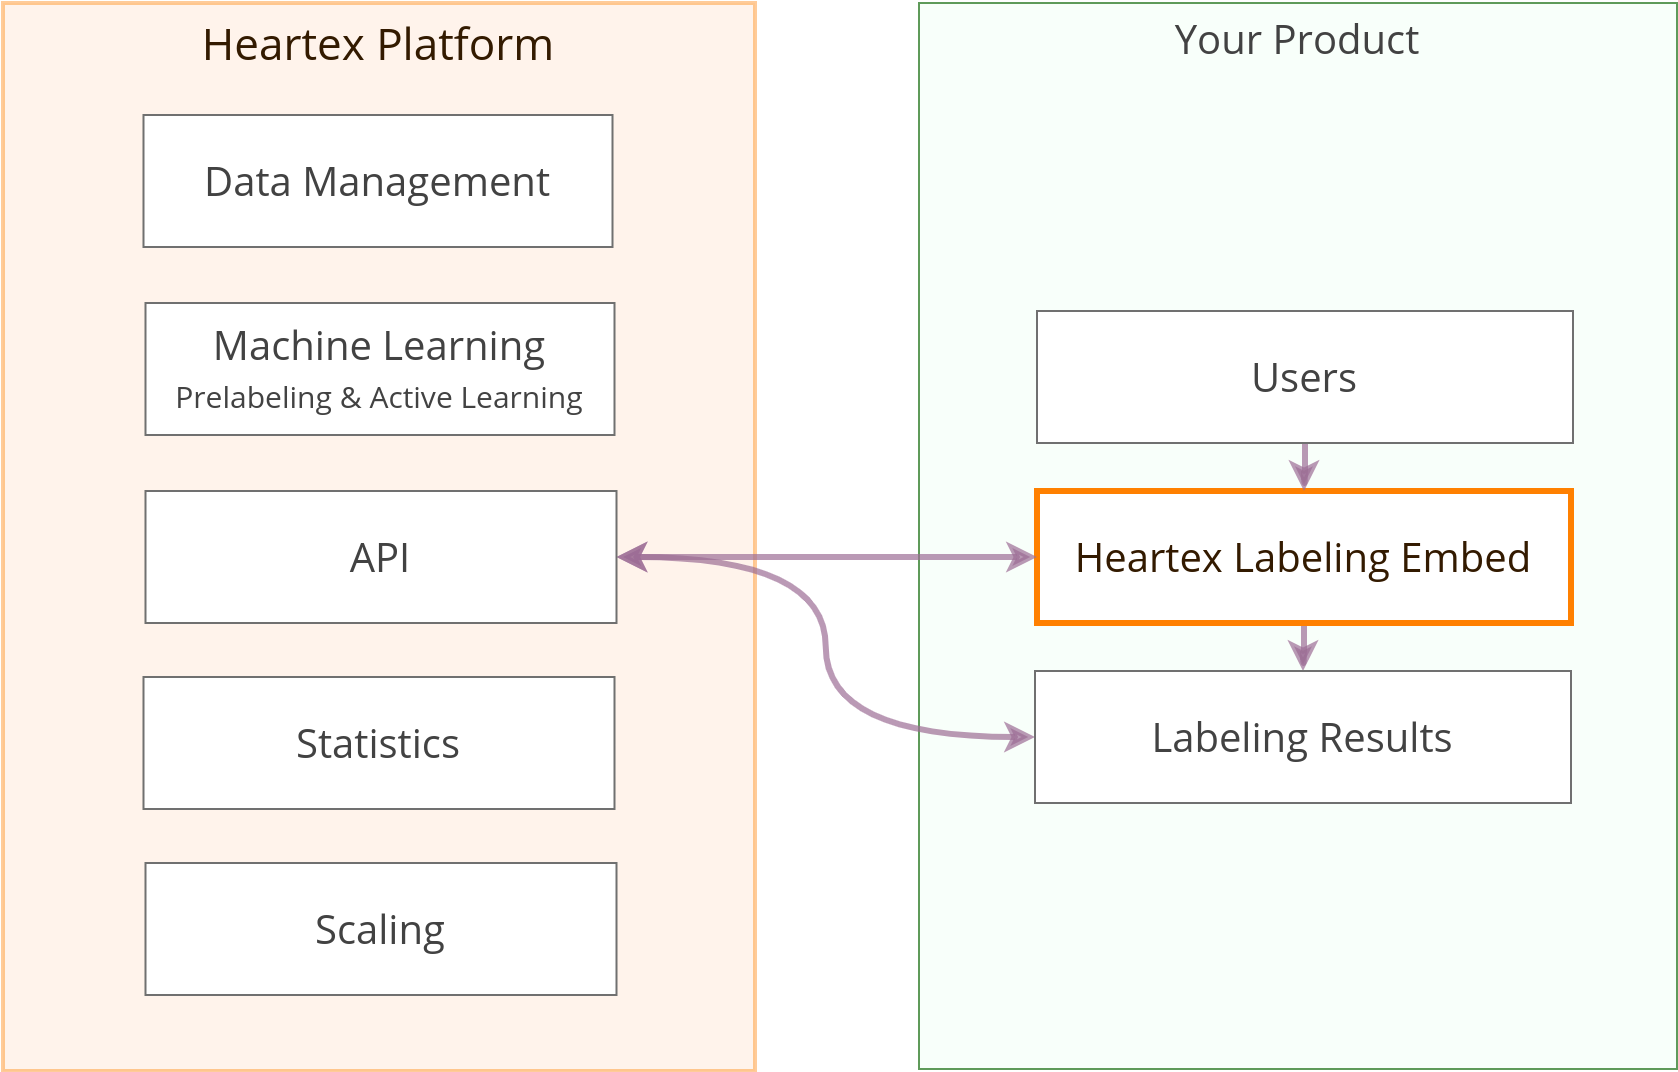
Embed the annotation interface right into your product. Manage and control the process from the Heartex dashboard. Customize the look and feel of the editor to follow your brand’s and product design.
Creating Virtual Collaborator
In order to initialize the SDK you need to obtain the authentication token first. The first step is to create a virtual collaborator (you can also use a real one). Collaborator account will be used to complete tasks, and usually, you create a separate collaborator account for every user of your own product or a cohort of users.
This can be automated using an API. API request returns a collaborator token that is further used to authenticate when loading and completing the task.
Requests and Response looks like this:
~/ » http -f POST https://app.heartex.ai/api/projects/1/experts/ Authorization:"Token 6c684e40104fd1c8b6b45ef0a663b5fa857689ba" email="test@heartex.ai"
HTTP/1.1 200 OK
Allow: POST, OPTIONS
Content-Length: 73
Content-Type: application/json
Date: Thu, 18 Nov 2019 20:29:50 GMT
Vary: Accept, Origin, Cookie
X-Frame-Options: SAMEORIGIN

{
    "expert_id": 1,
    "expert_token": "3d88cd31f15de845161659faaa6412c85feead24"
}
Embed Editor using SDK
Heartex provides you the SDK located at: https://app.heartex.ai/static/js/htx-v1.0.0.js. After loading the javascript you get the HeartexSDK object you can initialize. It expects an authentication token, for example the one you get above after creating a collaborator, and a set of parameters, for example a task id.
Check out the reference for all the available options.
When the initialization is done, it automatically renders the interface into the element with the provided html id. Here are four steps you need to take to embed it on your page:
Step 1: Include files
<link href="https://app.heartex.ai/static/sdk/htx-v1.0.0.css" rel="stylesheet" />
<script src="https://app.heartex.ai/static/sdk/htx-v1.0.0.js"></script>
Step 2: Create element
Copy or create a div element that will be used as a parent element for the Editor
<div id="label-studio"></div>Step 3: Loader script
Following script executes the code when the DOM is ready, if you use jQuery it’s an equivalent of $(function () {})
<script type="text/javascript">
  !function(d,o){d.domReady=function(n,a){o.addEventListener&&o.addEventListener("DOMContentLoaded",function e(t){o.removeEventListener("DOMContentLoaded",e),n.call(a||d,t)})||o.attachEvent&&o.attachEvent("onreadystatechange",function e(t){"complete"===o.readyState&&(o.detachEvent("onreadystatechange",e),n.call(a||d,t))})}}(window,document);
</script>
Step 4: SDK config
Initialization code. You need to edit $ variables to make it usable
<script type="text/javascript">
  domReady(function () {
      var Htx = new HeartexSDK({
          elid: "label-studio",
          token: $TOKEN,
          user: $USERID,
          project: $PROJECTID,
          usePrediction: true
      });

      Htx.labelTask($TASKID, { addInitialWhenEmpty: true });
  });
</script>