Labeling Interface
This documentation describes Heartex platform version 1.0.0, which is no longer supported. For information about setting up the labeling interface in Label Studio Enterprise Edition, the equivalent of Heartex platform version 2.0.x, see Set up the labeling interface.
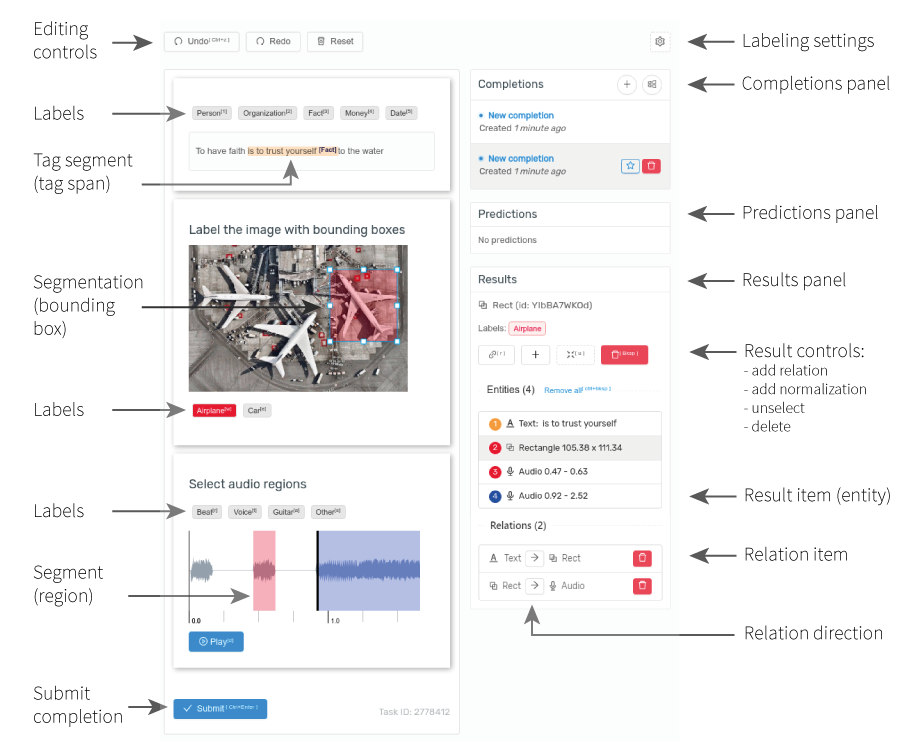
Let’s explore the complex example of multi-task labeling which includes text + image + audio data objects:
Labeling interface is implemented using JavaScript + React and placed to separated repository Label Studio Frontend. Label Studio has integrated Label Studio Frontend build.
Labeling interface is highly configurable: you can enable or disable some parts of it (completions panel, predictions panel, results panel, controls, submit & skip buttons).
Instructions
Most of the actions described in this section are similar for all the data objects (images, audio, text, etc.).
Choices, TextArea and other simple tags
Such tags have straightforward labeling mechanics. It’s intuitive for users, so let’s talk about more complex things below.
Add region
- Select label you want to add (if you use Tag without labels like Polygon, just go to 2)
- Click on your data object (image, audio, text, etc)
Change label
You can change the label of the existing region:
- Select entity (span, bounding box, image segment, audio region, etc)
- Select a new label
Delete entity
- Select entity
- Press Backspace or go to Results panel and remove selected item
Add relation
You can create relations between two results with
- direction
- and labels (read more about relations with labels)
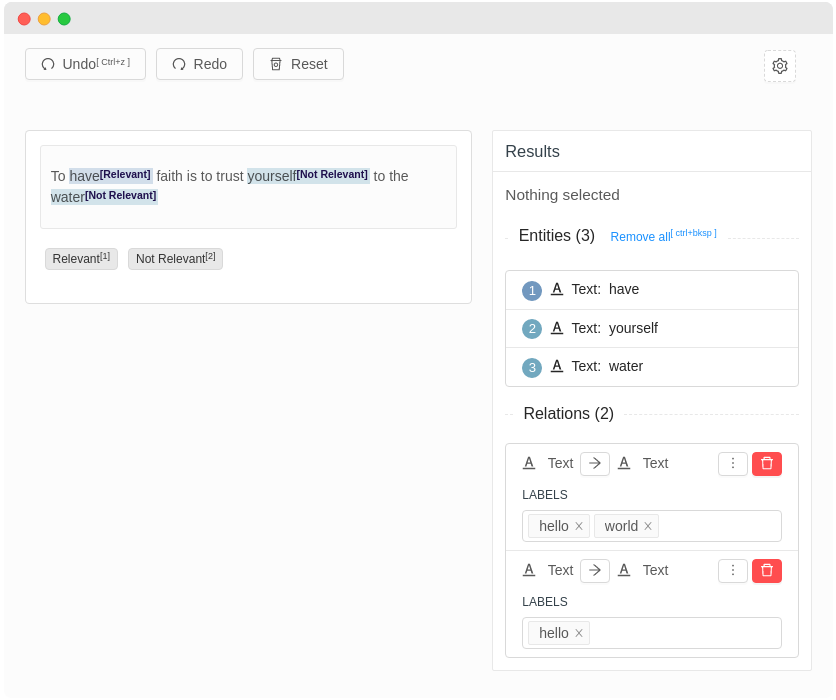
- Select a first region (bounding box, text span, etc)
- Click on “Create Relation” button
- Select the second region
- Optionally: After the relation is created you can change the direction by click on the direction button
- Optionally: If you’ve configured labels, click on the triple dots button and add your predefined labels
Hotkeys
Use hotkeys to improve your labeling performance. Hotkeys help is available in the labeling settings dialog.
| Key | Description |
|---|---|
| ctrl+enter | Submit a task |
| ctrl+backspace | Delete all regions |
| escape | Exit relation mode |
| backspace | Delete selected region |
| alt+shift+$n | Select a region |